
With a break for the holidays an extensive amount of time was spent on construction of all the subassemblies and exterior details specific to this unique behemoth. Following is an overview of construction details and obstacles overcome.

Test fitting of the upper hull resulted in making a decision to eliminate the double hull at the front . This would leave room for all the internal details without binding or breakage.

Eliminating the front inner hull was painless where as I just scribed the piece off leaving the large void.

Gluing the top hull was less complicated due to the fact I could see all internal components thru the front of the hull.

After letting the glue set up for an extensive time I proceeded to attach the front hull after the internal ridges were sanded flat and a interior coat of paint was done.

Following are a few pictures of the components coming together , lots of test fitting was done with each subassembly.

A mixed bag of details for the exterior. Since this model was constructed after Sept 44 and before Nov 44 there was no zimmerite added to the upper hull. All tool holders were very similar to the Ausf. G model with the exception of the double "C" hooks on the drivers side. References were checked on production models , I found up to 4 different variations of tool holders during the Ausf A production. I found recycling Dragon Ausf. G holders sanding them thinner and utilizing some Voyager clamps served the purpose. Adding some weld marks with styrene and using the Dragon tools completed these assemblies. The improved and strengthened spade was introduced in August 44 so the On Track model of the spade was utilized with some refinement { more on that latter }. The Mounting for the 2cm Kw.K was dropped but the mounting holes were still on the front hull so these were added.

Voyager fenders for the Ausf. A model were used, banged up slightly. Mounting for the barrel clamp was filled and sanded flush. Some models had this plated over on rebuilds. Metal wire was used for the grab handles at the front with weld detail added.


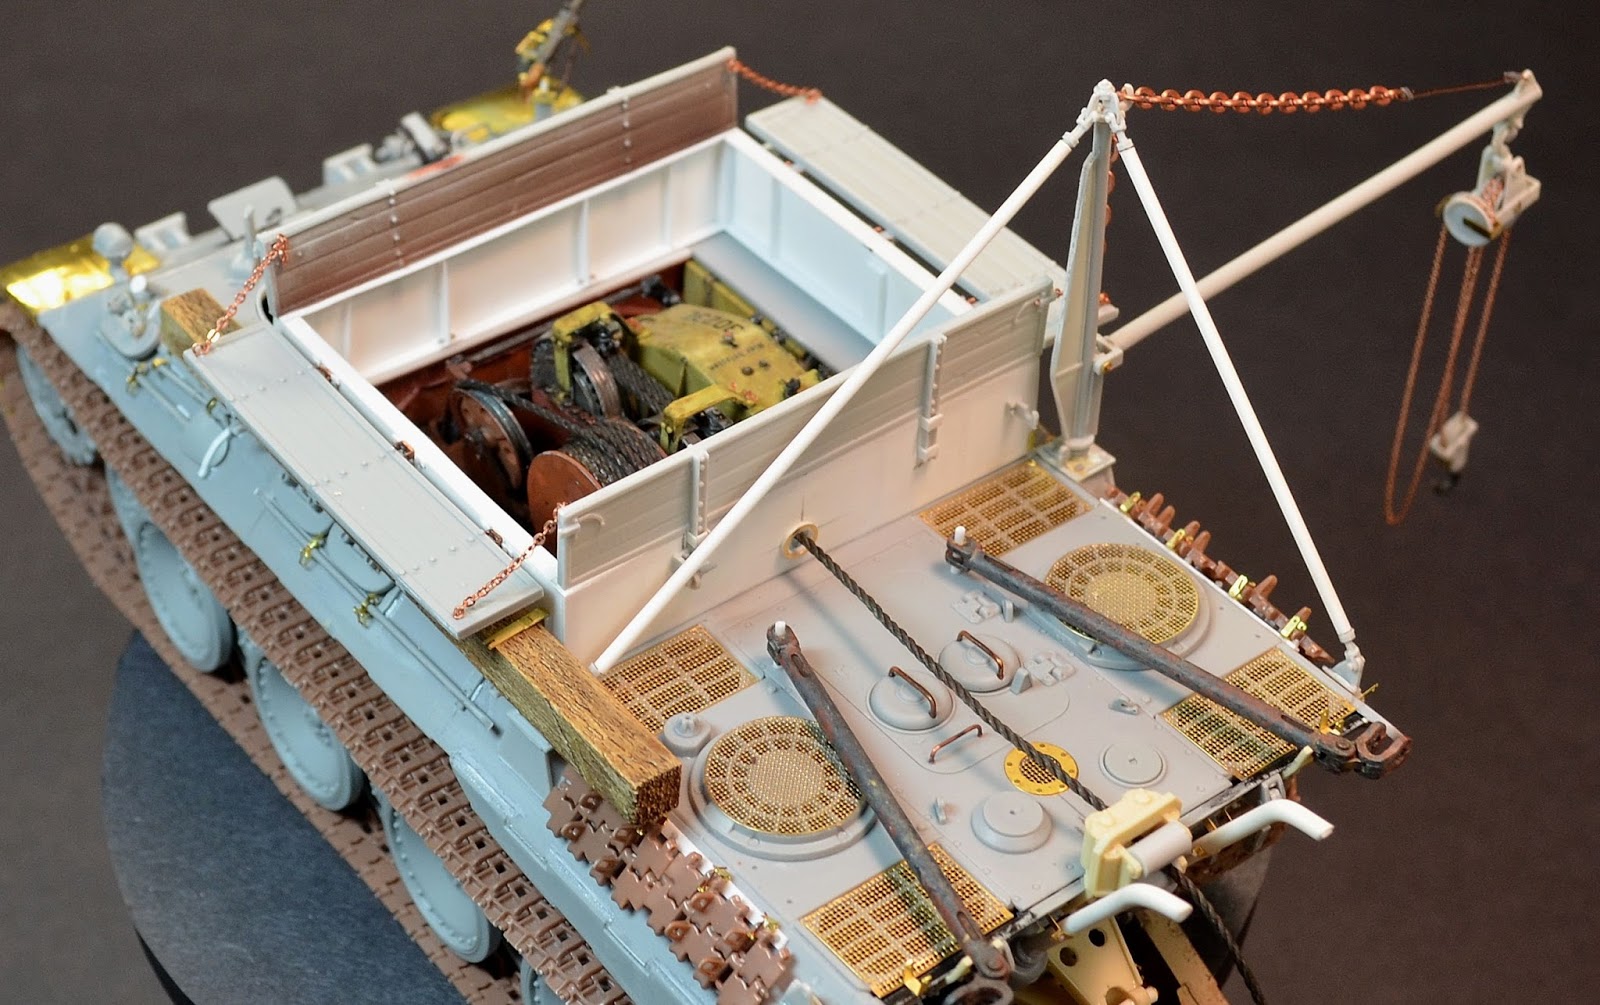
The 40 tonne monster winch , heart of the beast.

Some pictures of the completed unit. A kit in itself. Lots of test fitting and double checking the instructions before assemble. Some pieces were missing in my kit and Joe from TMD happily sent me the missing items. Talk about amazing customer service , one of the best out there.
I painted her up a little differently , more a little industrial than military in color variations.


Some more weathering will be added before final assemble into the belly of the beast.

Crane assemble finished after multiple fits of profanity were heard miles away.


Tow bars added from Tamiya, stolen from the spares box .


The completed hull with all its added accessories.


Lovely Model Kasten tracks below.

Spades.
Below is the difference between the early and late spades used on the Bergepanther. The TMD piece is on the left were as the On Track on the right.


Since I was going to use the late version , some refinement was made to the On Track Models piece using sheet styrene.

Panted with some Testors Metalizers for a primer coat which works great on resin.
Some Tresemme hairspray added. Then coated with Vallejo primer watered down with H2O.Washed with different tones of rust and primer. Surface tension made the paint flaky therefor making the effect even more useful.


Click on the picture for a close up of the paint detail.

Tamiya paint used with hairspray technique between coats.


Just some clear coat and weathering { dirt }needed to complete the spade.

Added pieces on the Late A model such as the tow bar holders, and extended towing pintle. I used the On Track Models pieces for this assembly.


Spade is removable for the time being in order to paint the kit.

Challenged.
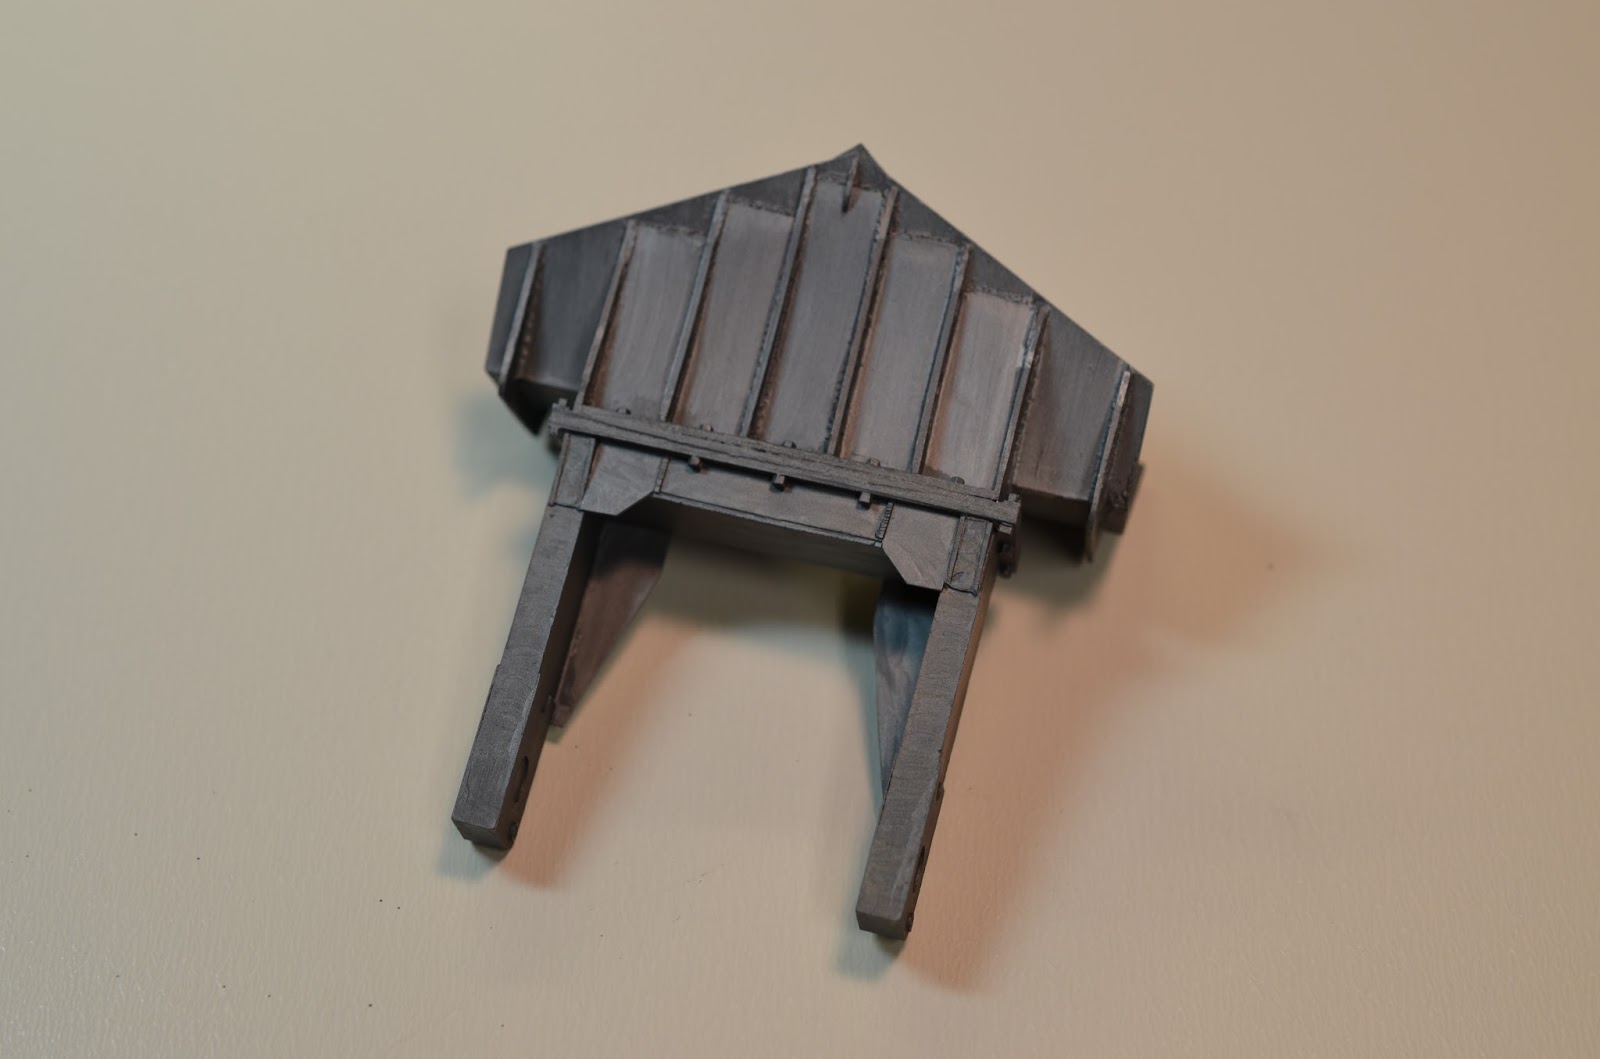
The box like structure for the top of the hull to enclose the winch was a testing ground for my modeling abilities. The TMD piece had some very taxing warps. I temped to fix these by immersing in hot water , adding styrene pieces , pinning to the hull. But with no avail there was no fixing the piece. I looked at the On Track Models structure but it was a little dimensional off.

The warped nightmare that temped my sanity. An extremely hard piece to cast , so some credit to TMD. I used this piece as a template for my scratch build piece and utilized all the other components for the build.

Below is the scratch built structure made of sheet styrene of different thicknesses. The TMD wooden parts were used as well as the added detail parts.


The winch loaded in the belly.


All the components together.


Zimmerite added to the bottom portion of the hull using "no more nails" technique.


Hope you all enjoyed this very long portion of my build . Feel free to comment or post questions.
Stay tuned for Part 3 where we add some paint .
