Thursday 30 May 2013

Sd Kfz 182 Pz. Bef. Wg Tiger Ausf. B: Modulation

Modulation : what ? ,  “Color Modulation”, is a new way to execute the finish of a model via a variety of painting processes .Google the process , my favourite is
by Mike Rinaldi found on Missing Lynx. Other examples are by Mig and Adam Wilder.
 Since this specific AFV is going to have a multitude of paint on it such as camo and winter wash we keep the modulation process to a minimum to keep down the layers of paint.


We have an abundance of colors starting with the Tamya Dark Yellow XF-59, and progressively get lighter with Desert Yellow , then Buff, all with highlighted variants in between of all the base colors . As you can see they are numbered , the white is used to lighten all shades. All colors are sprayed on in varies areas to give some variation to the base color , high lighting top areas .The pre shade process is still there to give some depth, more definition will come in the wash, pin wash and mapping later.

Some tonal differences can be seen in this pic.

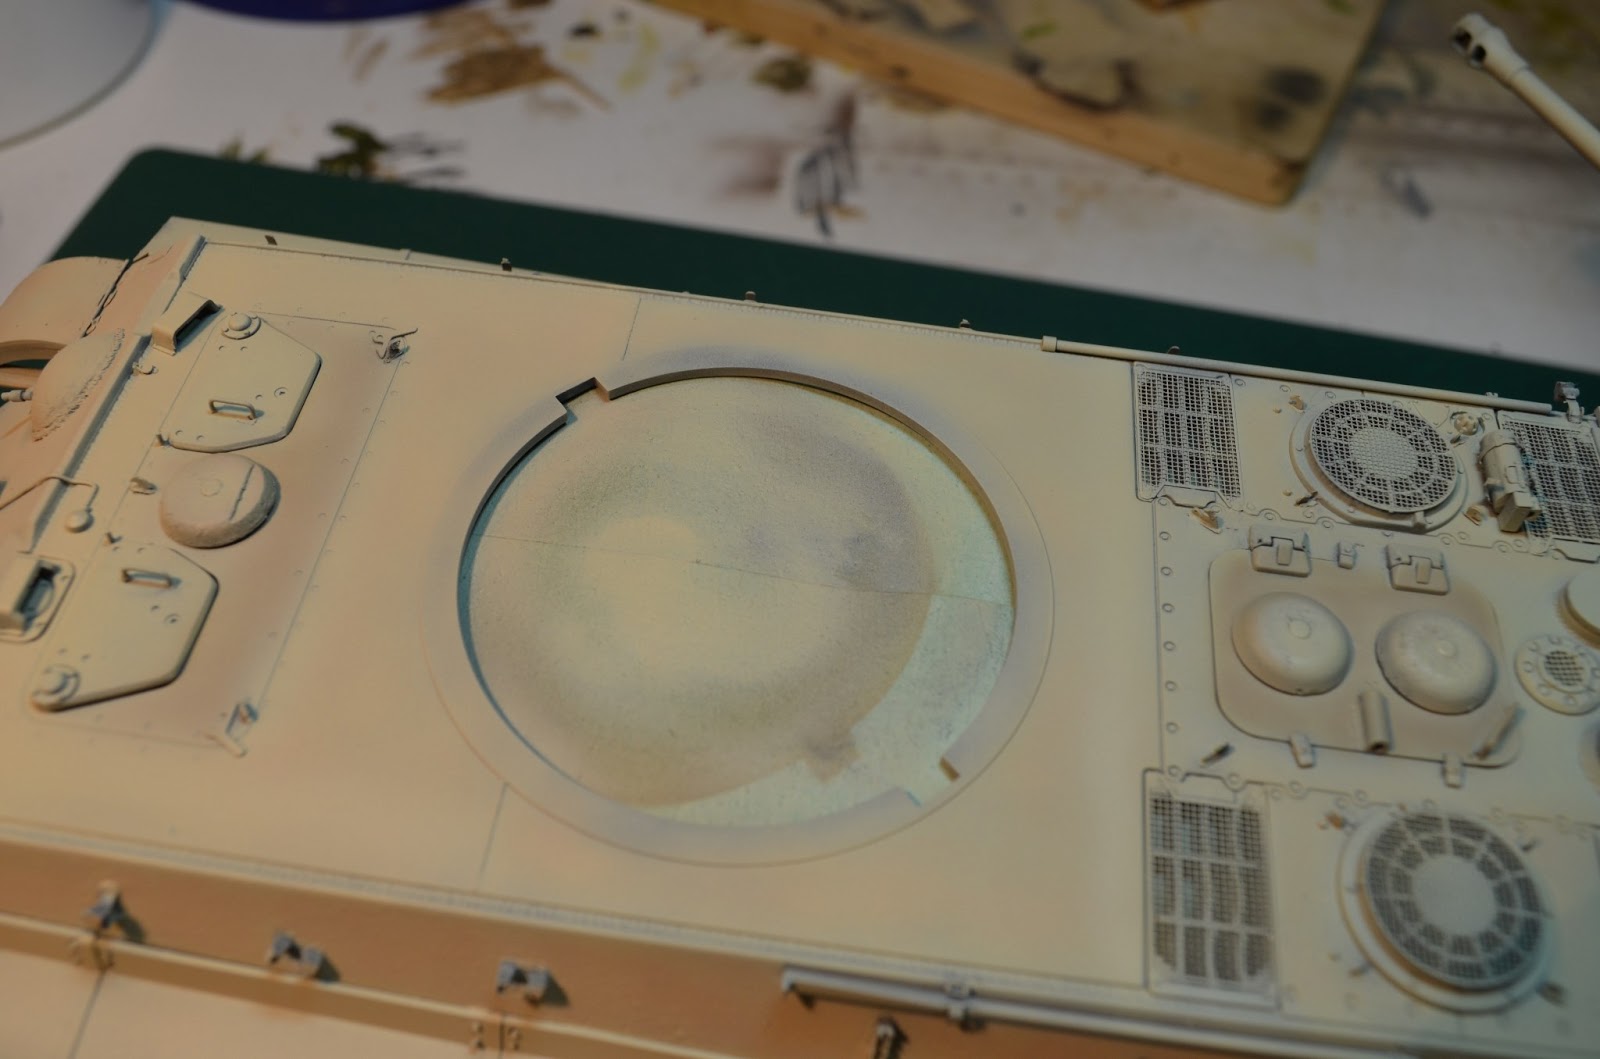
Try not to "over think" the process since this is just the base color.

Is the colour right? , don't get me started on this debate , make your own speculation and paint the colour YOU think works for you. No two eyes are the same , therefor everyone looks at color's differently.

I like to start with light color's for they have a tendency to darken with all the weathering processes.

Time to let it dry, next step , masking and tonal modulation of camo.


Sd Kfz 182 Pz. Bef. Wg Tiger Ausf. B: Primer and Post Shading

Welcome back , as many of you know the painting process can be a labour of love or hate. A multitude of issues can occur when painting your new gem. Air brush pressure , compressor heat or moisture , paint consistency , paint compatibility, excessive relative humidity, paint adhesion , and paint flow.

Set Up : I like to mount my pieces on balsa blocks in which I've used over the years , some have 100's of coats from various builds but have always been used for such a purpose. Narrow blocks are used about 2 inches wide and 4 inches in length, these are mounted onto a base of some sort. Using painters tape I usually double side it and adhere it to the painting blocks. Then place the piece needing some paint onto the tape, This way it can be easily moved with out jumping around when blasting it with your air brush.

Primer : I usually use a good quality primer coat which lately has been from the Vallejo line , before I would use a enamel base but all those ketones flying around in your man cave can do some damage to your lungs and brain. I find the Vallejo primers are the right consistency right out of the bottle and they give you a considerable amount for the dollar. The only issue I have had in regards to this primer is clean up must be done between coats , this is durable stuff but can plug your prised airbrush in a hurry.


I Start with a semi gloss black which is good to "shadow" all the crevasses and can give you a good visual if you need to fix any screw ups. As stated before be prepared to spend some time at the desk with your air brush , cleaning periodically and emptying you water trap on your line. Take some time to inspect your piece before moving on to the next step , this is your chance to fix any build boo-boos.


After letting the black coat set for a day or two I move onto the high light primer which is Desert tan Base, I use a Iwata Eclipse HP-BS with an old { 25 year } Badger 180 compressor @ 30 PSI. I do light coats until most of the dark areas are covered.

 
Next segment will be modulation, so stay tuned .

Friday 24 May 2013

Sd Kfz 182 Pz. Bef. Wg Tiger Ausf. B: Adding Texture

I will try to update my build a little more with more steps involved. As you can see with the last post ,all the photo etch and texturing  on the upper armour has been added , this was done with subtle Gunze 1200 and 500 and some Tamiya Surface primer. This time around we add texture to the bottom half of the model where  accumulation of dirt and grime reside. This area is a little more pronounced therefor we use some baking soda with the Tamiya surface primer.

We utilise a very used brush , something that we can toss after this application. Cheap craft brushes for these specific tasks can be obtained at Wally World or Michael's or your fav Brick and Mortar Craft Store.


Using the surface primer , blot some on and stipple it onto the area needing the texture. Try not to do an area to large for this stuff dries fast. Then sprinkle on some baking soda , Let is set for a minute or two and blow off with your air brush or lungs.
Areas that will accumulate a large amount of crud add some layers of the previous steps.

 Don't forget areas that are easily forgotten, like the undersides of fenders .

Let all this work sit for a time before progressing to the primer coat, which will be covered next.
 

Monday 20 May 2013

Sd Kfz 182 Pz. Bef. Wg Tiger Ausf. B

A quick snapshot of another build in progress, yes another Kingtiger. My favourite German subject and over the years have built up an impressive collection of reference books and kits. As you tell in my blog , I have built a few as well. This is a Dragon kit the premium edition ,with the addition of the Griffon photo etch set which I think is the best on the market, superior to any other photo etch manufacture in reference to accuracy , instructions and ease of build. Tasca set , and some parts I robbed from a Dragon Tiger 1{6253}kit.

 All the fenders are soldered for strength and studded onto the body with brass rod. Styrene spacers under the photo etch were glued onto the side so there was no gap underneath.

All tools and accessories are separate in ease of painting and placement after camo applied. The exception is the fire extinguisher.

Used the Tamiya track hangers due to their strength and proper design , the Dragon ones are wimpy in comparison. Some texture using my Dremel, some dental bits and some Gunze surfacer. Still some work to do on the loaders hatch.

                                  Some resin addition's to the front light pilfered from my stash.
Top portion is not glued on , still some detail needed for the cable and painting underneath in the rear area under the engine vents.

                                               Casting numbers added from the Griffon set.
                                         Added detail to some of the tools , more still to do.


Cast texture added using Gunze surfacer and baking soda.
More updates on this build to come shortly.
 

Sd Kfz 251/3 Ausf D Late

Another update , some pictures of the AFV Club 251/3 which was a troublesome kit from the beginning. I have built both Tamiya and the Dragon kits and yes they had issues with measurements of scale, questionable interiors, or some fit issues but this was one of the poorer fitting kits I have built over the last couple of years. To top it off the Voyager photo etch set was used that had it's fit issues as well. So to say the least this kit was turning into a bit of a nightmare. Sounds funny but airbrush problems occurred and I was tempted many time to make a halftrack a missile in my "Man Cave ". Sometimes this hobby can be somewhat frustrating , but take a breath , put it down and work on something else.
Lots of research into this kit with the interior wiring for the radios and antennas. This is a very late model with the last production tracks { dragon }, Voyager , Lion Roar, and Verlinden photo etch, Hussar resin wheels, RB turned antennas, converted front suspension using AFV and Tamiya parts to have articulating steering.


Aber photo etch was used somewhat in the radio build , with some improvement made to the existing kit pieces.


 Paint was Model Master base with acrylic details and oil fading and chipping . Most of the weathering was done with Mig pastels and some filters.


Hope you all like my troublesome 251, feel free to comment .

Sunday 19 May 2013

The Beast is Done

I had a lot of fun with this monster , after extensive chipping, weathering, mudding it up with some experimentation with the AK weathering line.


  I used everything in my paint drawers , oils , acrylics, pigments and enamels, washes , tints and washes from all the following manufacture's: Mig, AK, Tamiya, Model Master ,Vallejo , and Cromacolor.


Hope you like the beast ,feel free to leave any comments and stay tune for more model madness.