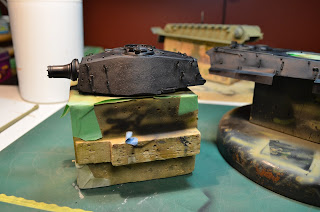
Set Up : I like to mount my pieces on balsa blocks in which I've used over the years , some have 100's of coats from various builds but have always been used for such a purpose. Narrow blocks are used about 2 inches wide and 4 inches in length, these are mounted onto a base of some sort. Using painters tape I usually double side it and adhere it to the painting blocks. Then place the piece needing some paint onto the tape, This way it can be easily moved with out jumping around when blasting it with your air brush.
Primer : I usually use a good quality primer coat which lately has been from the Vallejo line , before I would use a enamel base but all those ketones flying around in your man cave can do some damage to your lungs and brain. I find the Vallejo primers are the right consistency right out of the bottle and they give you a considerable amount for the dollar. The only issue I have had in regards to this primer is clean up must be done between coats , this is durable stuff but can plug your prised airbrush in a hurry.
I Start with a semi gloss black which is good to "shadow" all the crevasses and can give you a good visual if you need to fix any screw ups. As stated before be prepared to spend some time at the desk with your air brush , cleaning periodically and emptying you water trap on your line. Take some time to inspect your piece before moving on to the next step , this is your chance to fix any build boo-boos.
After letting the black coat set for a day or two I move onto the high light primer which is Desert tan Base, I use a Iwata Eclipse HP-BS with an old { 25 year } Badger 180 compressor @ 30 PSI. I do light coats until most of the dark areas are covered.
Next segment will be modulation, so stay tuned .


No comments:
Post a Comment