Good day once again.
Thanks again for checking in for an update. Just a note , most of the build updates are in progress and don't have fancy backgrounds, awesome layouts, or photo booths set up for snaps of the build. These are in progress shots with the accumulation of paint , glue , and debris that happens when doing a base.
For this specific build I wanted a suitable base to present this specific vehicle in a specific locale without the story line that goes with a dio. This is a presentation base only. A fast synopsis of my ground work and maybe a few ideas that are new to you. this is a fast build for the base and doesn't cover days , weeks and months that normally follow with a dio build.
Items used are simple , but with great results. I buy cigar cases at the local craft store for a nominal fee and are nice and simple to use. They have rounded corners with dovetail edges and seem to be the perfect size to put an AFV on for display or creating a dio. I have used these for years as you can see from my previous works.
Another item that is utmost simple is good Styrofoam , use blue construction grade or as seen here high density white that comes with Ikea furniture. Planks of balsa wood , pencil, marker, exacto knife and toothpicks. I cut out the thickest piece of Styrofoam and place it in the large bottom of the cigar box.
Placement of the vehicle or figures should be offset from center and to an angle at some degree. Try to visualise the movement and the immediate settings next to the vehicle.
I try to incorporate as many tiers as I can without looking like a side of a mountain. unless your conveying that scenario.
Placement of different sizes of Styrofoam holding them together with toothpicks and the visualisation of a roadway.
I cut the ends off and do final placement of the blocks.
Glue them together with weldbond pva glue. Highly recommend this stuff , glues almost anything , dries clear and can be used with pigments and acrylic paint.
Final placement and glued. Total working time less that an hour so far.
After drying I sculpt the edges and line the border of the Styrofoam with balsa wood. I add 3/4 inch round head wood plugs to the bottom for legs.
Creating the base of the groundwork is a key element to your base , most items are "riding on this' so it is a critical step. Making sure that it isn't going to flake, crack, expand, or shrink. Your base should be light and hard . I have had bases over the years have to put up to the romping of felines loose in the man cave, and have lived to tell the tale.
Ok, on to the mix , polyfilla wet crack filler ,pva, glue, pigments and acrylic paint and water. All mixed together on a yogurt lid or in this case a ice cream lid.
After the slurry is blended it is spread on the base a couple millimetres thick and left about 10 minutes to dry. A set of Tamiya Tiger tracks at the ready.
A 6 liter tote full of varies diorama making materials at the ready. Some items taken out and placed on top for quick application. Roots , twigs, natural animal hair { from the fishing store } spices ,
cat litter, nuked dirt from the garden , rocks of varies sizes from the back alley, Henki grass turf , floral stuff from the craft store , the list is endless.
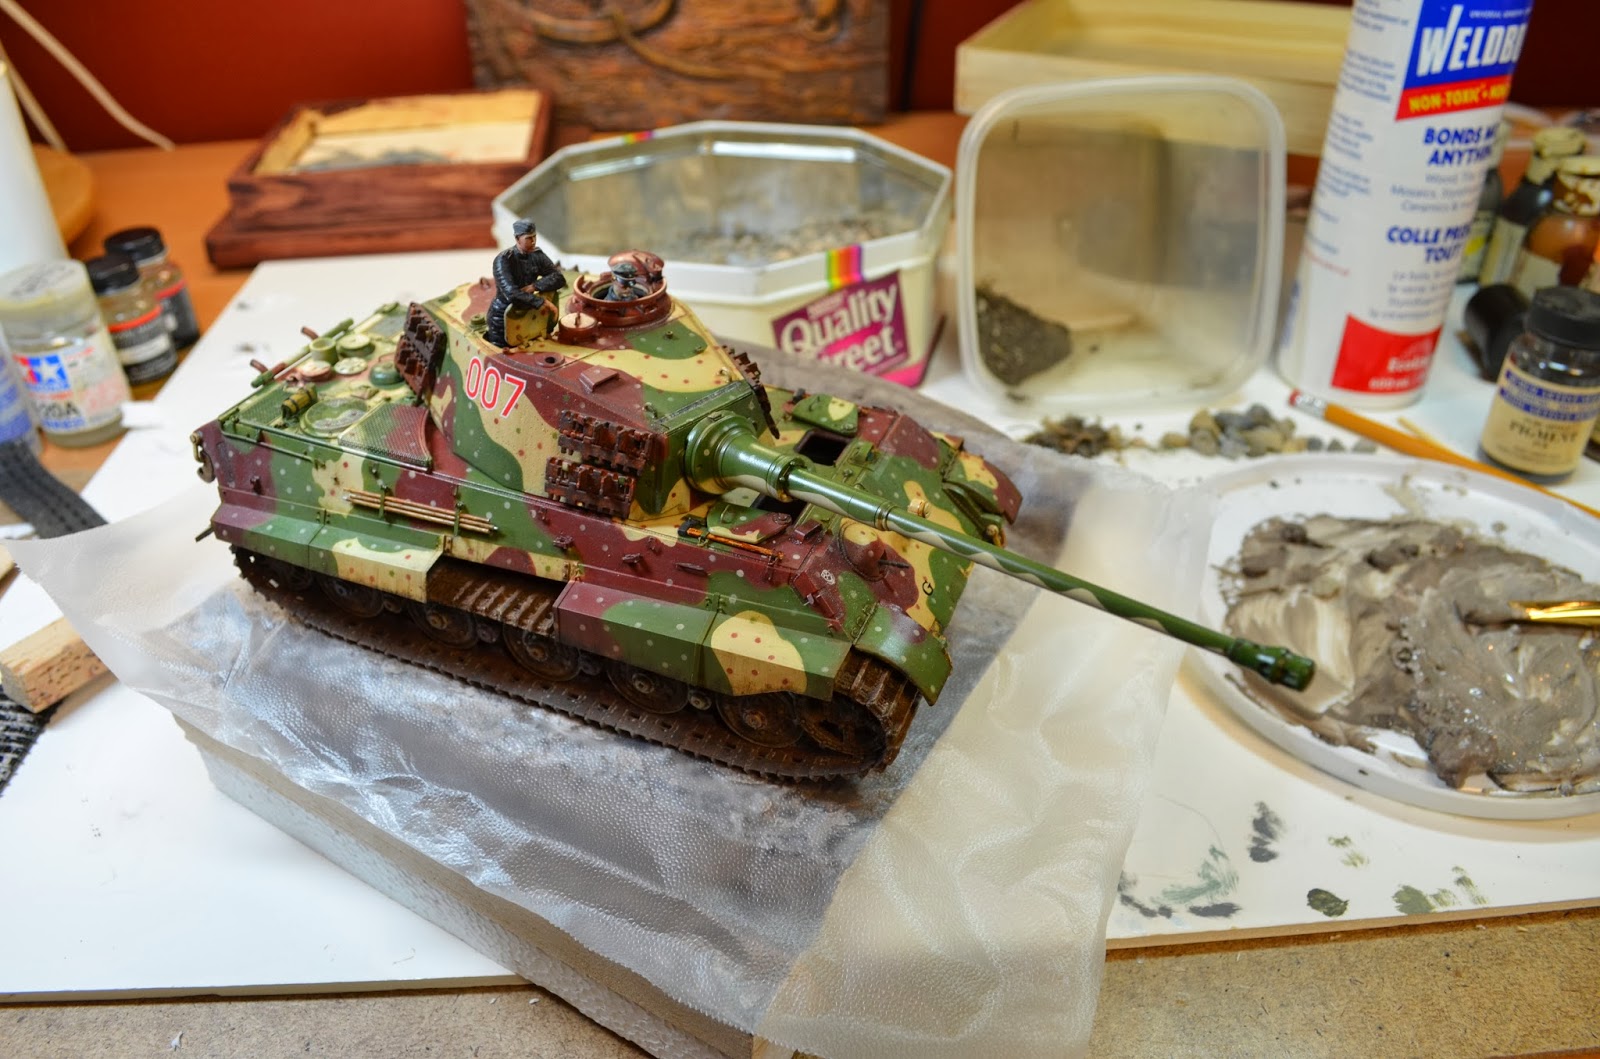
With the base still damp with the application of the slurry we start with the track impressions .
System 1 : Cutting the rubber tracks in half I place them in the slurry and make impressions into the muck. Make sure you measure the width and have the aliment correct.
System 2: involves , glad press and seal.{ place advert here }
Placing the sticky side up on the press and seal cover the area that you want to make some impressions.
Place you vehicle on top and gently press down. Wait about a week for step 2 to dry and remove vehicle.
After the removal of the vehicle , time to go nuts and add your foliage and groundwork. I do this in layers adding the small details that sit closes to the ground first and work my way up. Small grasses leaves , rocks and paper ferns are added at this stage.
I add more layers of dried flowers , roots and debris. Let dry for a couple of hours before proceeding to the next layer. I find adding long grasses near the end protects them from damage. It is important to use as many coats of thinned pva { with water} between every step.
Placement of the majestic ride in its soundings. Final placement of a fir tree made from Hudson and Allen pine boughs. The true trick is to go around your base adding as much detail as you can. Try to cram as much foliage into an area as you can . Study the area your trying to copy. I searched the web and came up with some very precise articles on the Hurtgen forest. Dry time can be as much as two weeks, between all the layers of scenery and pva. Don't rush the dry time.
Now its time for some ice cream.
Next update I will blend everything together, and finish the base, thanks for checking out the blog and happy trails.


bien partie ce petit dio .........
ReplyDelete