Bridge Dio Part 2
Good day,
Well progressing on this dio with fall approaching there's more time to build in the man cave.
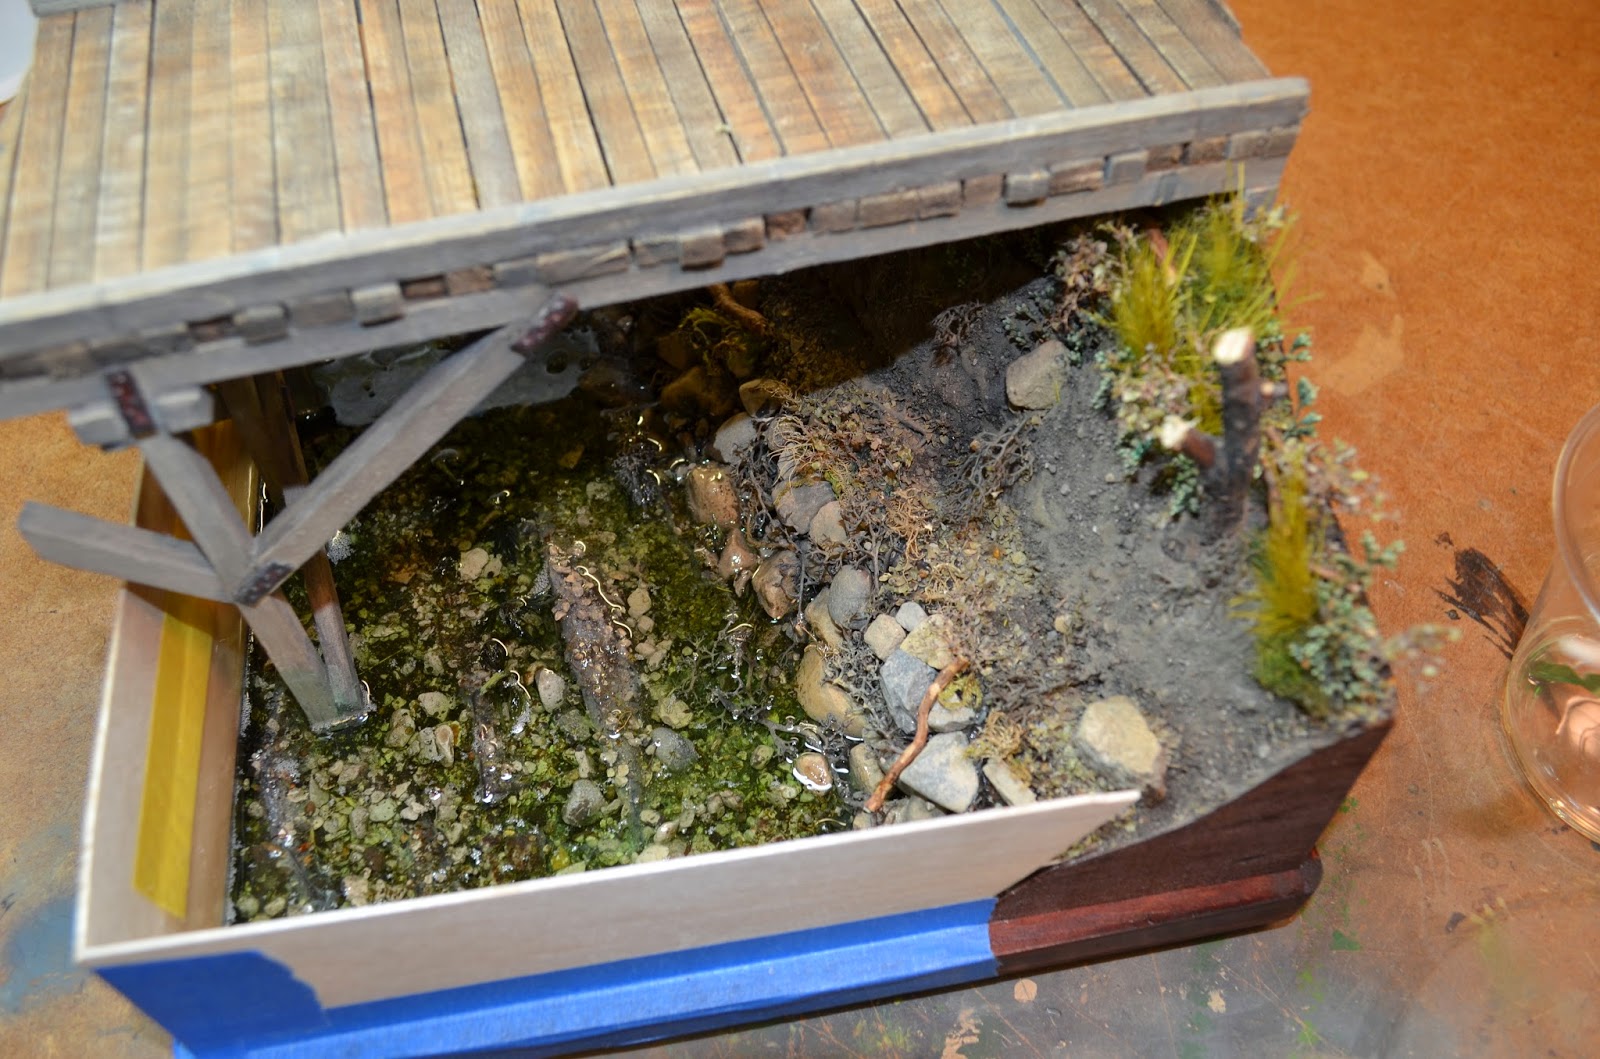
Ground work almost all done with an assortment of Henki grass, fly bate fur , natural ground , twigs, roots, rocks from the alley, sea foam and natural dried plants. Layered on with pigments thrown into the pva. Always think two steps ahead when doing ground work. It seems to work for me.
River bed and embankment is done with thought of natural erosion taken place.
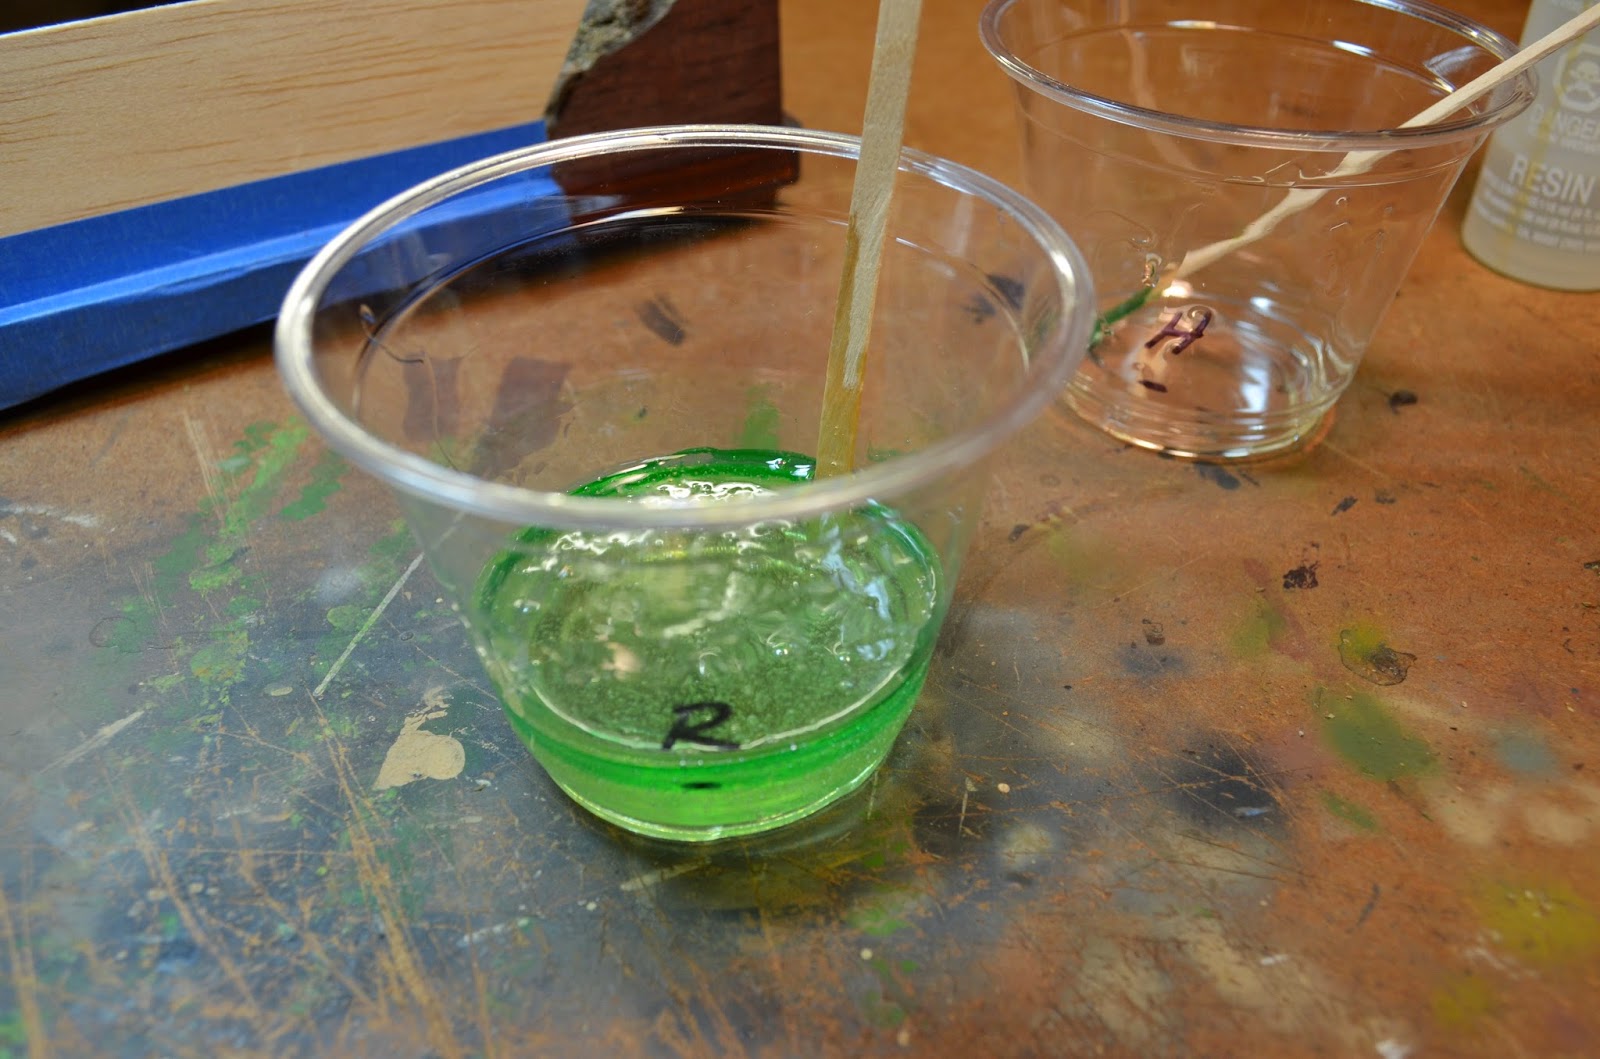
First layer of clear casting epoxy.
Easy Cast clear casting epoxy is the easiest medium to use when making large volumes of water that are transparent. The trick is to do layers not more than 5mm at time. I've done extensive experimenting and this seems to work the best with little heat, warping and minimal of air bubbles due to it takes about 12 hours to cure at this thickness. I add only 2 drops of Tamiya clear green , less the better.
Measure equal amounts then add of few drops more of hardener due to this is the vessel your poring out of.
Add two drops of clear green , then mix the two together for about 3 minutes.
Second layer of epoxy with bridge imbedded into dio base.
Looking good , nice tonal color, now to keep in a dust free environment for at least 12 hours with some ventilation.
Time to work on some items to have in the river to add some interest. Maybe a fishy or two, a boat ?
Progress of Mantis resin fish and a Dragon models boat, not sure on the boat yet.
Lucky, my cat knew I was doing something with "fish" , and came for a closer view.
That's all for now , more updates to come shortly.


No comments:
Post a Comment